Create a SAML application in Google Workspace
This guide explains how to configure Google Workspace as the identity provider for a SAML application protected by XFA. Google Workspace sends authentication to XFA, XFA verifies the device, and the protected application receives the SAML response when access is allowed.
Google Admin ships with built-in SAML apps for several popular services (for example Slack). When configuring one of these, we recommend adapting the built-in app at admin.google.com/ac/apps/unified instead of creating a Custom SAML app — the built-in app comes with the SAML attribute mapping the service expects. Check the application-specific guide for the application you are securing before following the Custom SAML steps below.
The steps below describe how to create a Custom SAML app. Use these only when no built-in SAML app exists for your application, or when the application-specific guide explicitly tells you to.
1. Navigate to the Google Admin interface on admin.google.com and go to Apps > Web and mobile apps
2. Click on Add app > Custom SAML app
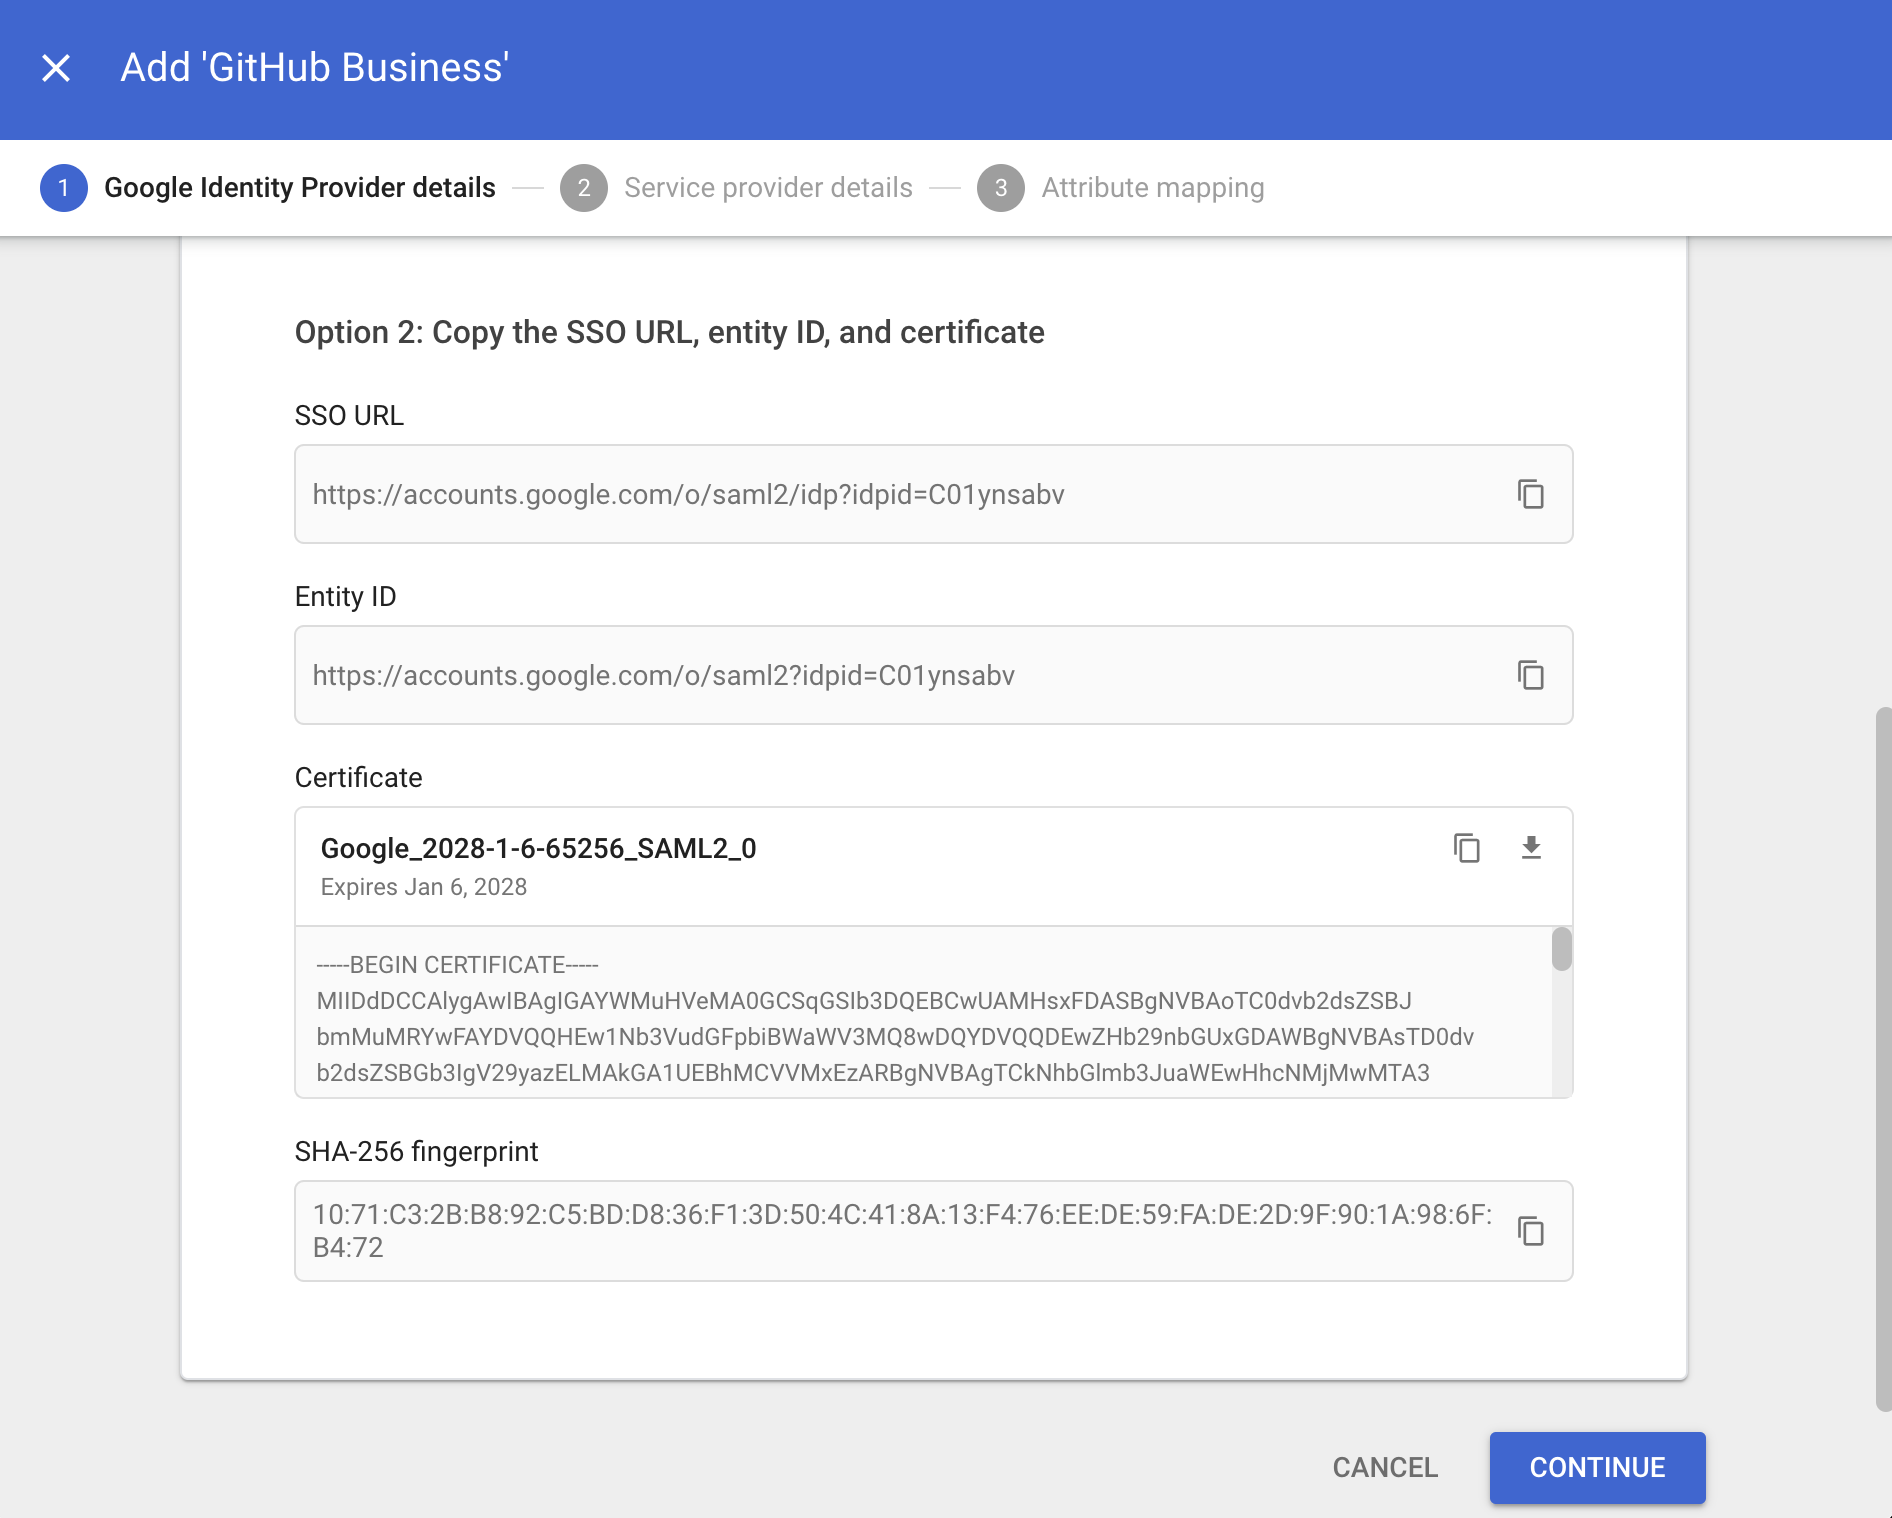
Copy the SSO URL, Entity ID and Certificate of the app in Google and keep them safe to configure the XFA application at a later stage.
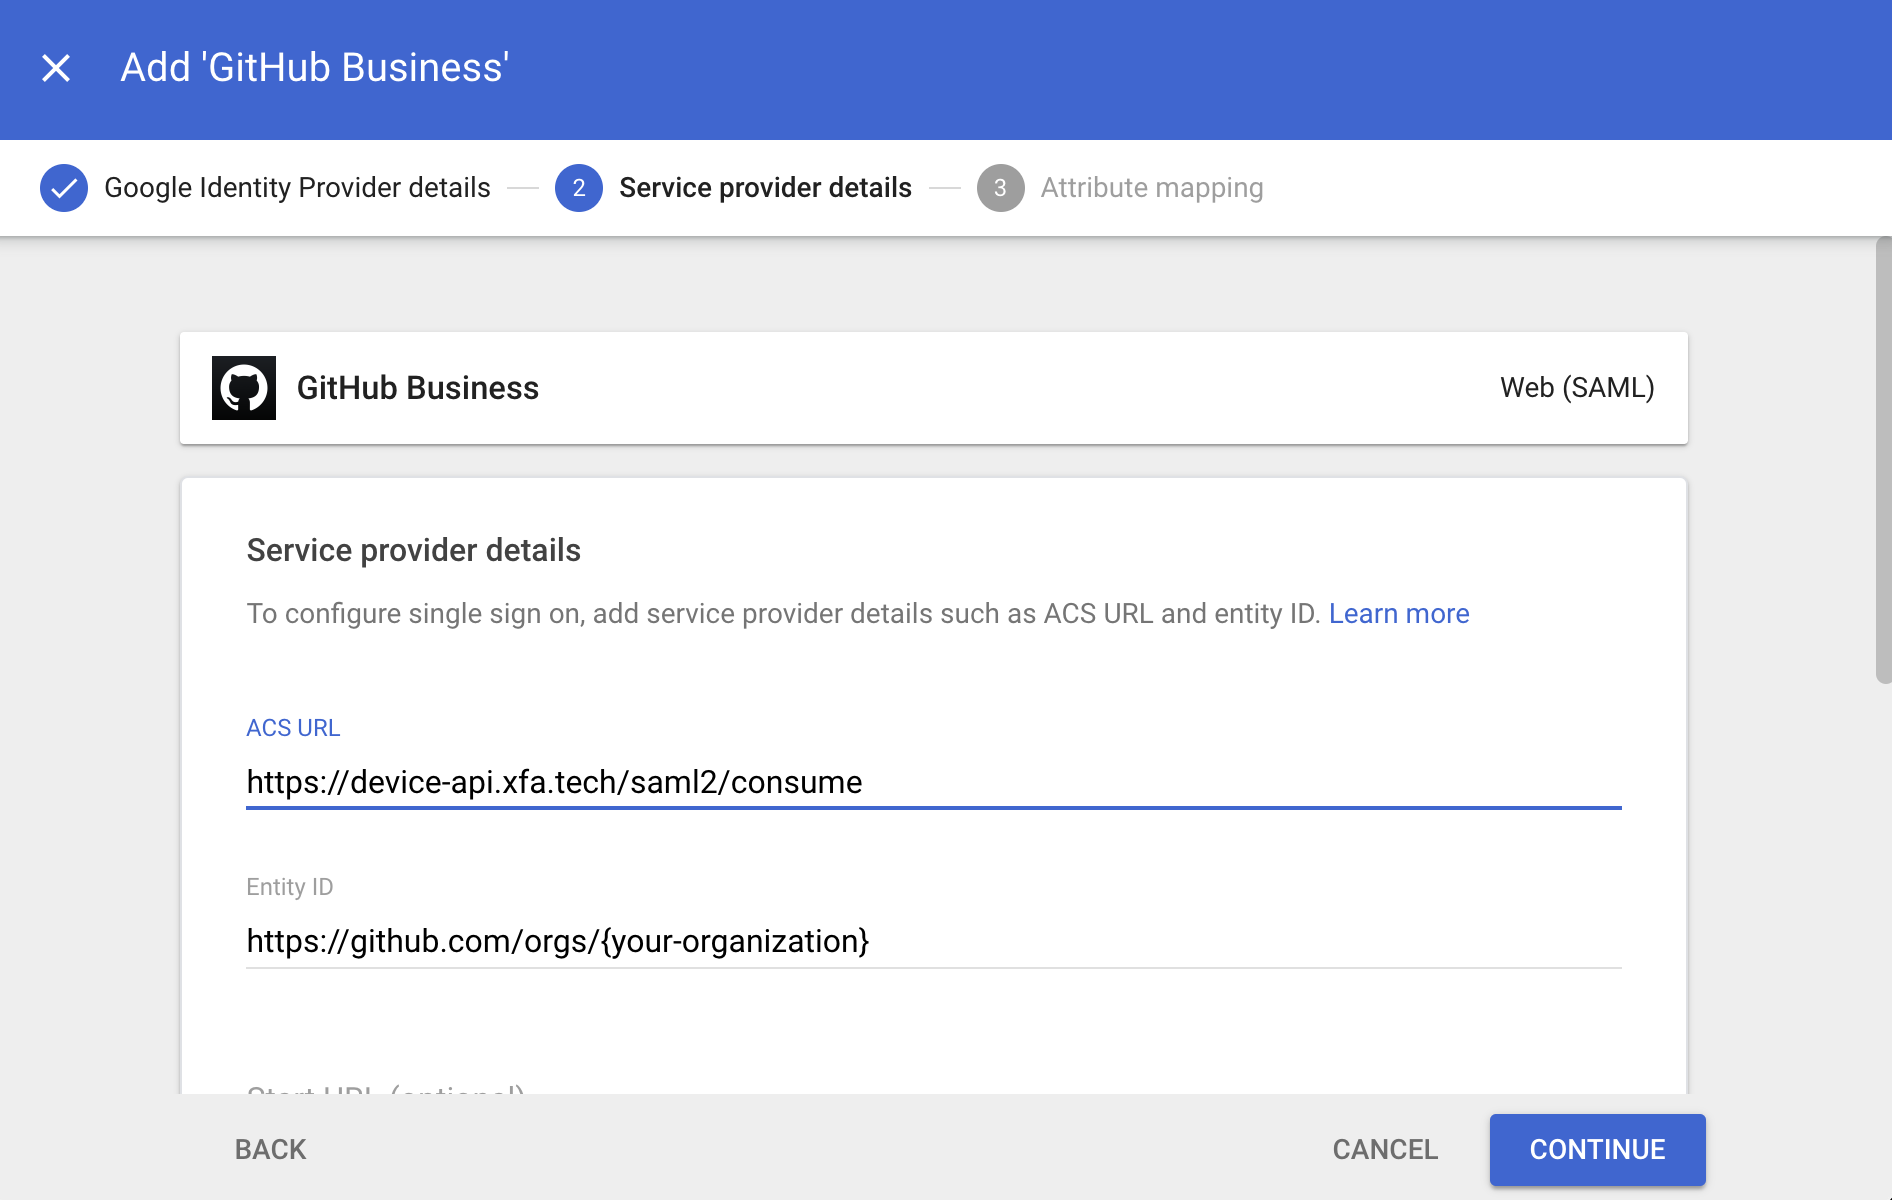
3. Configure the application to work with XFA.
- Fill in the ACS URL-field with
https://device-api.xfa.tech/saml2/consume - Complete the Entity ID with the Entity ID / Issuer of the business application you want to configure.
- Click finish to complete the configuration.
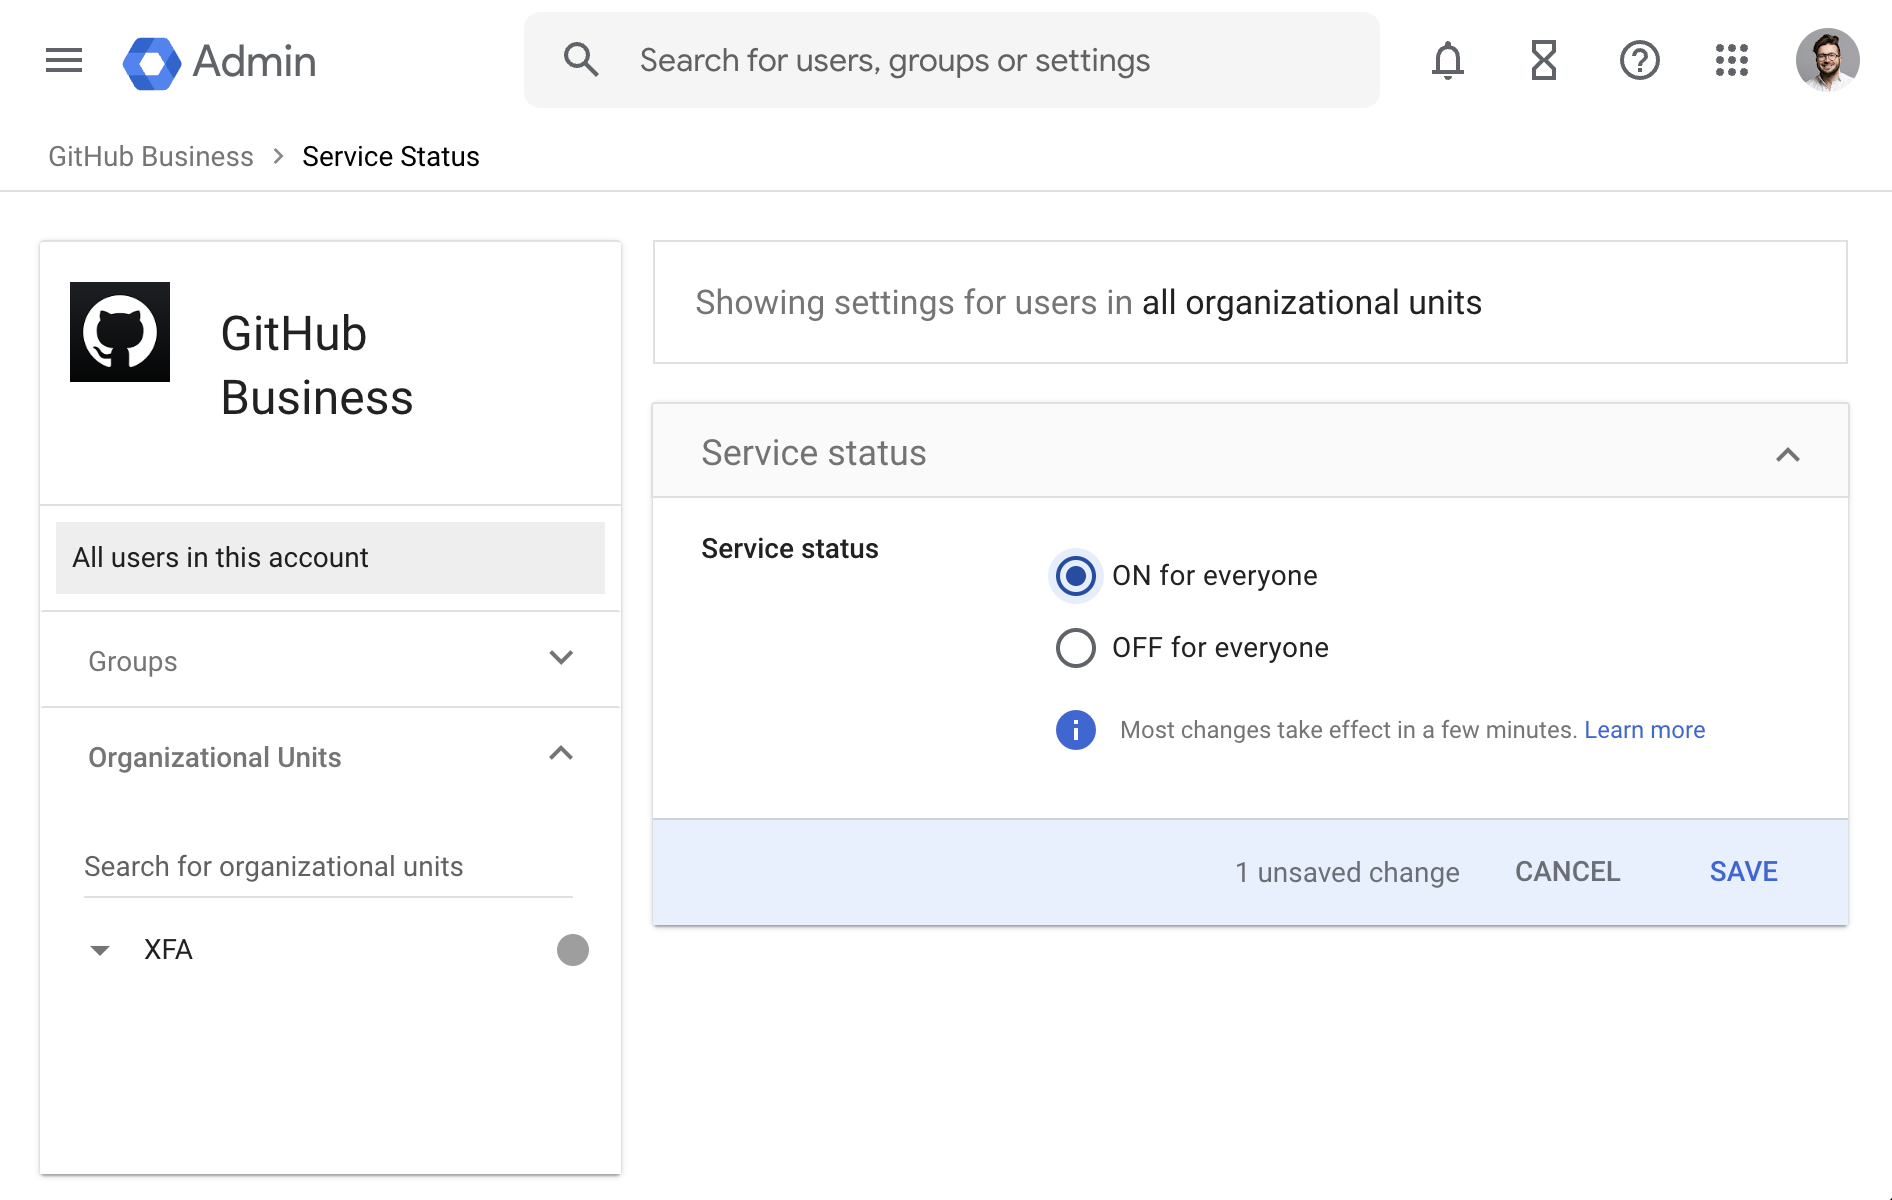
4. Optional: Make sure your users have access by navigating into User access > Service Status.
Enable the app for the users or groups that need access to GitHub.